Importing and exporting your Email or Personal Authentication certificate using Internet Explorer
This document explains how you can use Internet Explorer to import or export an existing CPAC/Email certificate.
Exporting your Certificate from Internet Explorer:
-
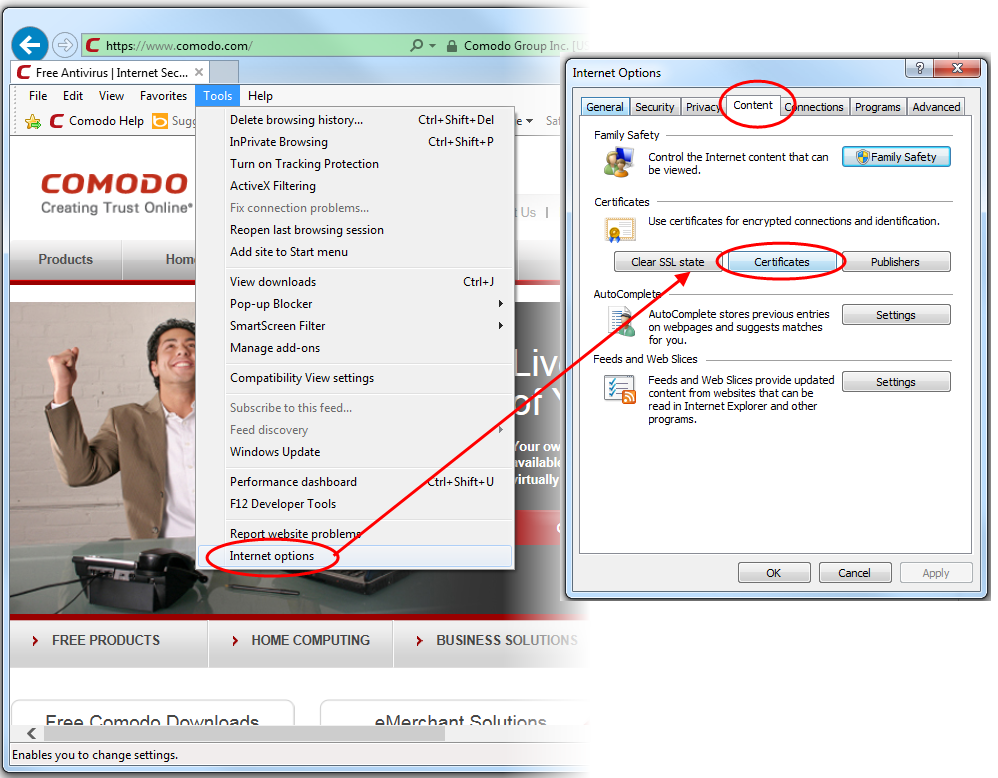
Open Internet Explorer then click 'Tools' > 'Internet Options'.
-
Select the 'Content' tab and then click the 'Certificates' button.
-
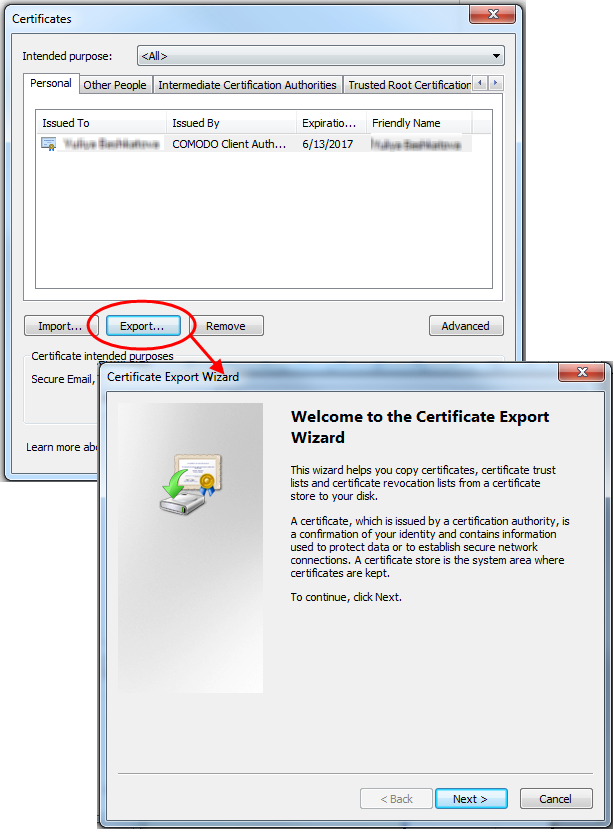
In the Certificates interface, make sure the 'Personal' tab is selected.
-
Choose the certificate you wish to export from the list and click 'Export...'.
-
In the Certificate Export Wizard, click 'Next'.
-
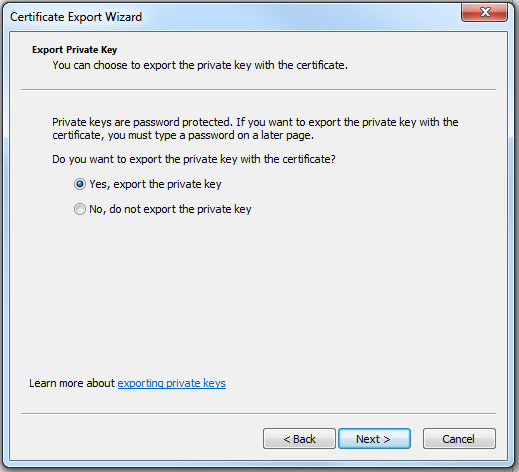
You must export the private key if you wish to use the certificate for digitally signing mail/documents and/or for authenticating yourself to websites. So if you intend to import your certificate into another browser/email client or mobile device, then we advise you choose, 'Yes, export the private key'.
-
If you only need to export the certificate for the (more limited) purposes of sharing or archiving your public key, then select 'No, do not export the private key'.
Option 1 (Export with private key)
-
Select 'Yes, export the private key' and click 'Next'
-
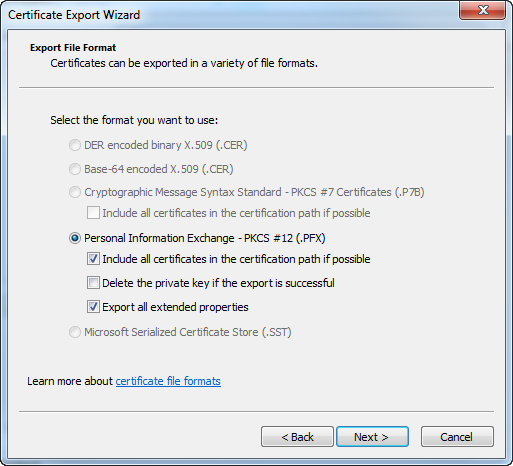
Select 'Personal Information Exchange' and make sure 'Include all certificates in the certification path if possible' is selected. Click 'Next' to proceed.
-
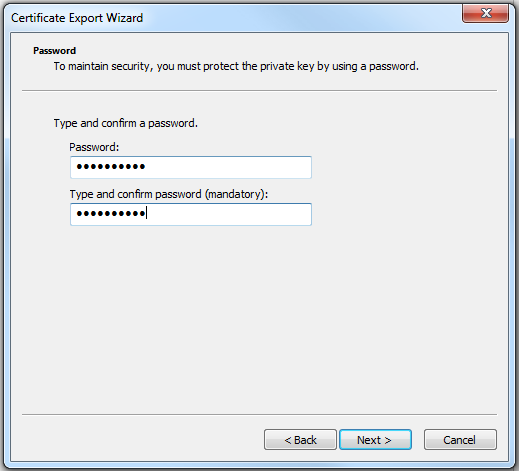
Next, create a password to protect the PKCS12. This will be requested should you later import the certificate into another browser/mail client or device.
-
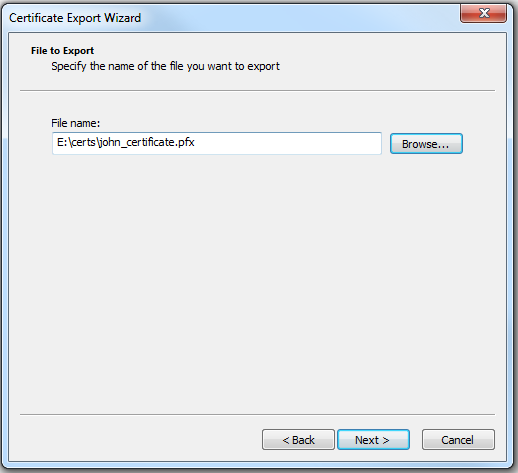
Your certificate will be exported to a PKCS12 file. Click 'Browse' and navigate to the location where the certificate should be saved and click 'Next'.
-
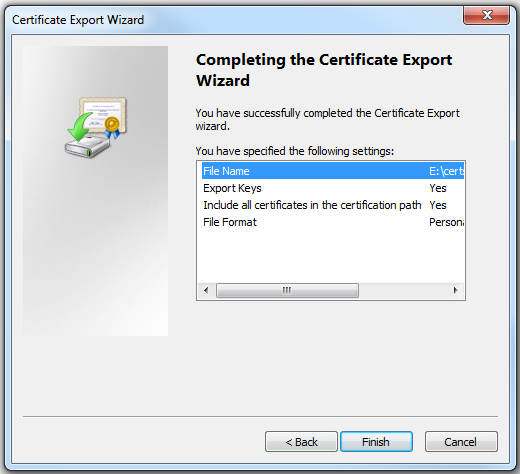
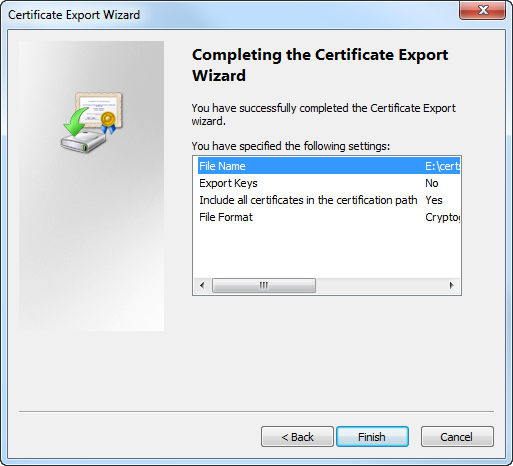
Review the export settings then click 'Finish' to complete the export.
Option 2 (export without private key)
-
Select 'No, do not export the private key' and click 'Next'

-
Select 'Cryptographic Message Syntax Standard' and make sure 'Include all certificates in the certification path if possible' is selected. Click 'Next' to proceed.
-
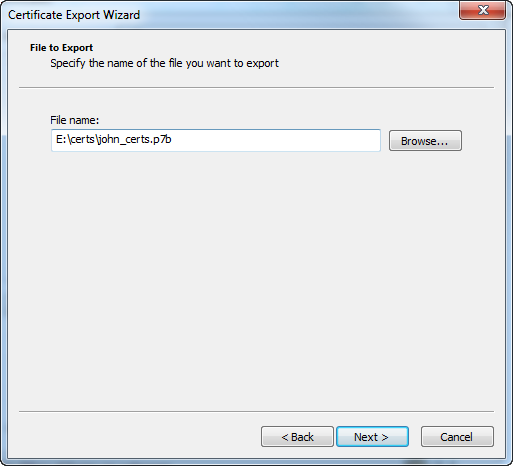
Click 'Browse' and navigate to the location where the certificate should be saved and click 'Next'.
-
Click 'Finish'.

That's it. You have successfully exported your Comodo Personal Authentication certificate from Internet Explorer.
Importing your Certificate into Internet Explorer:
-
Open Internet Explorer and click 'Tools' > 'Internet Options'.
-
Select the 'Content' tab and then click the 'Certificates' button.
-
In the Certificates interface, make sure the 'Personal' tab is selected, click 'Import' and then click 'Next'.

-
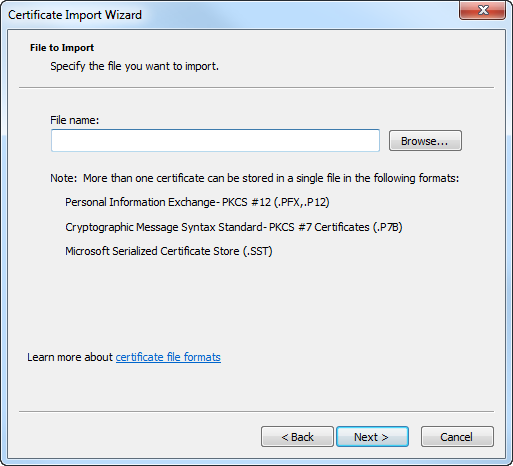
Click 'Browse' in the next step and navigate to the location of your PKCS12 certificate file.
-
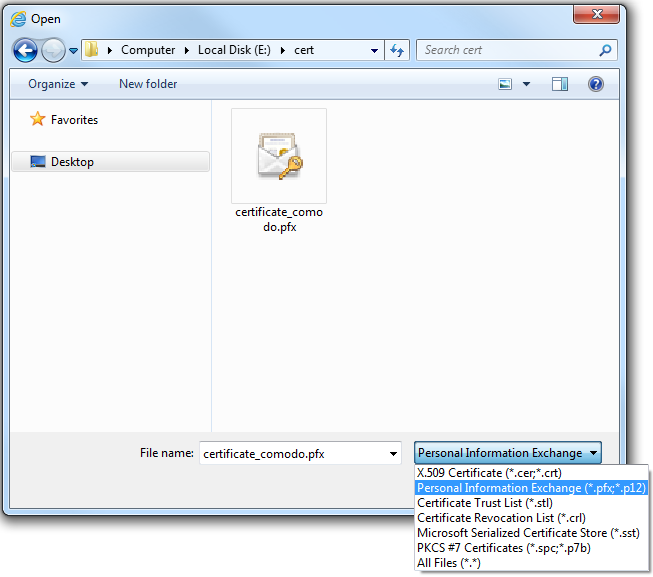
Locate your certificate file and click 'Open':
-
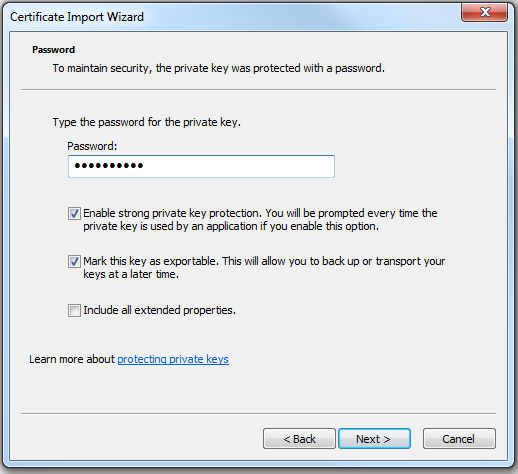
After locating your certificate file, click Next. To complete the installation process, you are required to enter the PIN (password) you set up for the certificate during the enrollment process. If you have forgotten your password, contact your system administrator who will be able to reset it for you.
-
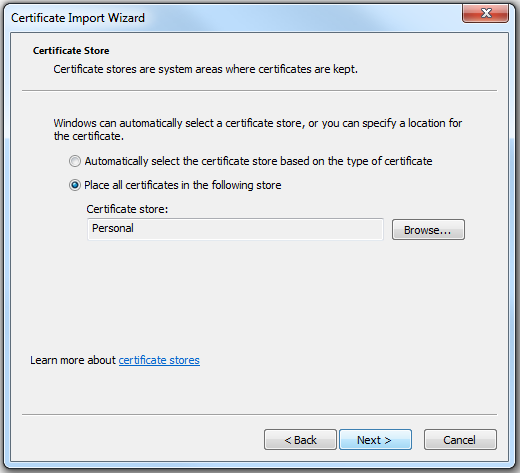
Click Next. You will be prompted to choose the certificate store for your certificate. Unless your administrator has specified otherwise, you should leave this at the default Place all certificates in the following store option.
-
Click 'Next' to proceed to the review and confirm stage:

-
Click Finish to complete the process. The certificate will be imported.
-
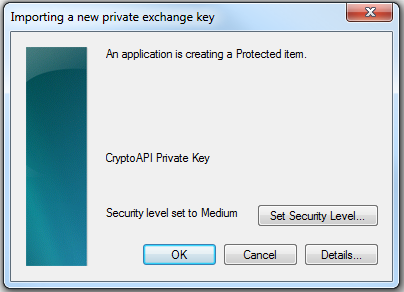
Select the security level for storing the Private Key in your system and click OK.
That's it. You have successfully imported your Comodo Personal Authentication certificate into Internet Explorer.
