Comodo Secure DNS
Enjoy a safer, smarter and faster Internet
Enjoy a safer, smarter and faster Internet

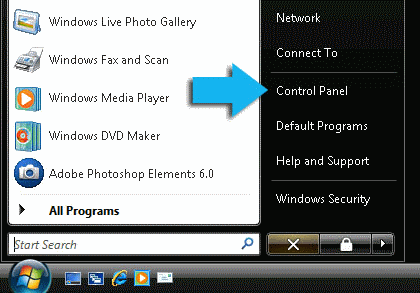
1. Click the Start Orb, then select Control Panel.
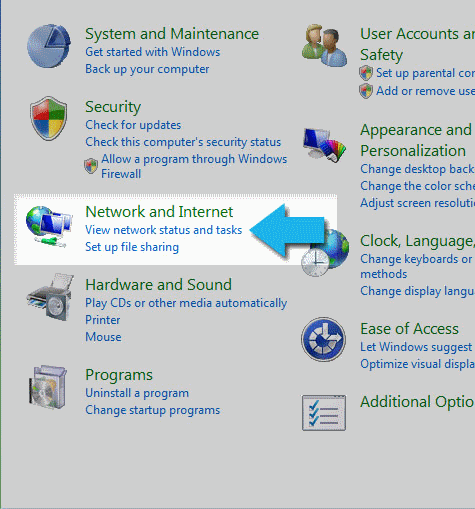
2. Click on View network status and tasks.
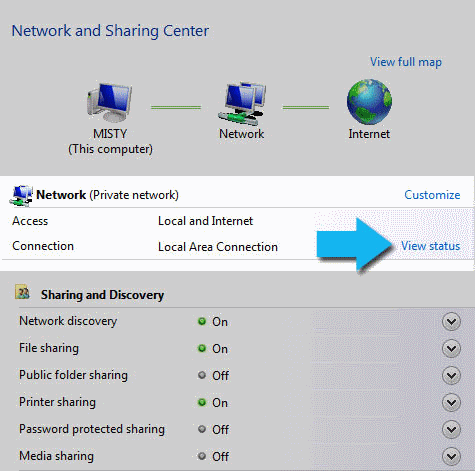
3. Click on View Status.
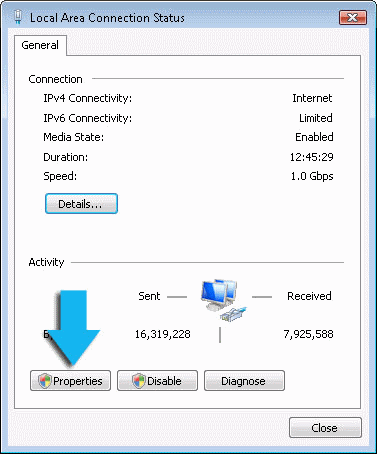
4. Click the Properties button.
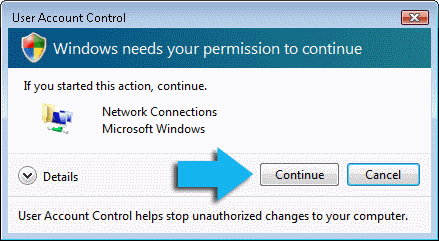
5. Vista may ask for your permission to make changes. If so, click the Continue button.
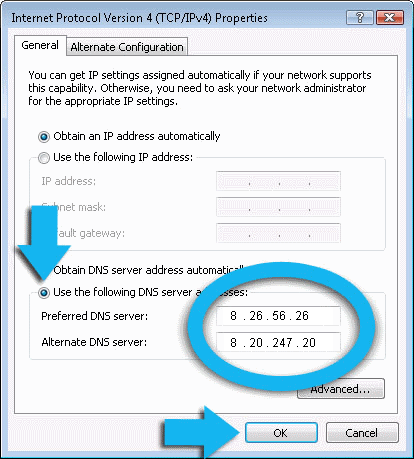
6. Select Internet Protocol Version 4 (TCP/IPv4), then click the Properties button.
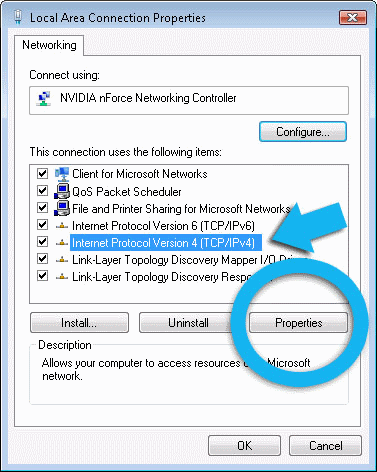
7. Click the radio button Use the following DNS server addresses and type in 8.26.56.26 in the Preferred DNS server and 8.20.247.20 in the Alternate DNS server fields.
Please write down your current DNS settings before switching to Comodo Secure DNS, in case you want to return to your old settings for any reason.
Preferred DNS server address for Comodo Secure DNS is:
8.26.56.26
Alternate DNS server address for Comodo Secure DNS is:
8.20.247.20