


-
Products
-
Home & Home Office
-
E-Commerce
SSL Certificates Email and Identity Code Signing Certificate Authentication PCI Compliance PC Support Email Security Site Seals Endpoint Protection E-Commerce Bundle Includes:
EV SSL
Managed DNS
PCI Scanning
Trust Marks
Vulnerability Scanning
Purchase Protection
Customer Reviews - Small & Medium Business
- Enterprise
- Partners
- Social Media
Video Support Blogs
Importing and Using your Email or Personal Authentication certificate with Windows Live Mail
-
If you originally applied for the certificate on the same computer as your Windows Live Mail then it should already be installed. You can skip straight to 'Signing and Encrypting'.
-
If your certificate is not already installed on the computer you are using, then please export it from the machine on which it resides using one of the browsers listed on the CPAC main page. You then need to transfer it to this computer (email it to yourself or save the certificate file to USB then copy over). You can then follow the 'import' instructions in this document.
Importing your Certificate into Windows Live Mail:
-
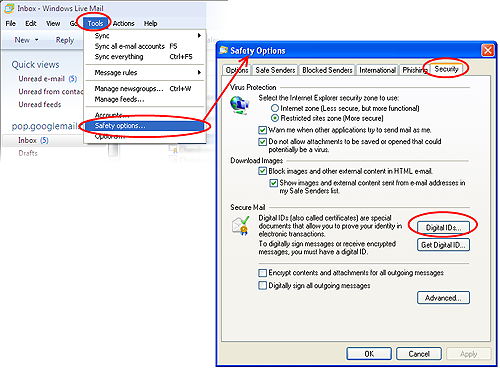
Open Windows Live Mail and click 'Tools' > 'Safety Options...'. (If the menu bar is not displayed, click on the Menus icon
 in the tool bar and choose Show menu bar from the drop-down.)
 -
Select the 'Security' tab and then click the 'Digital IDs' button.
-
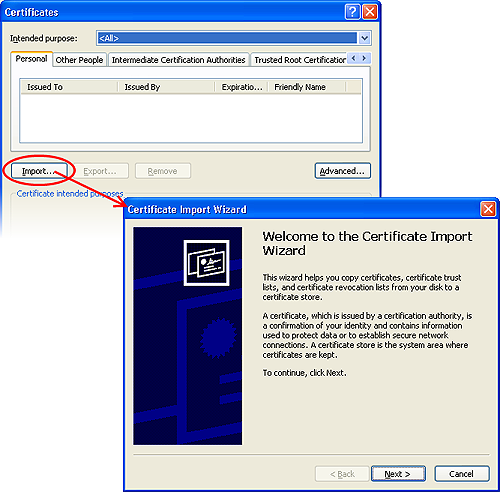
In the Certificates interface, make sure the 'Personal' tab is selected, click 'Import' and then click 'Next'.
-
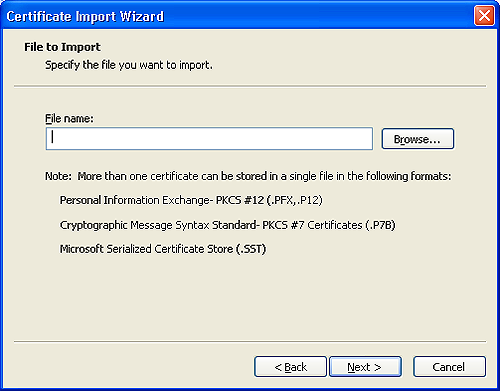
Click 'Browse' in the next step and navigate to the location of your PKCS12 certificate file.
-
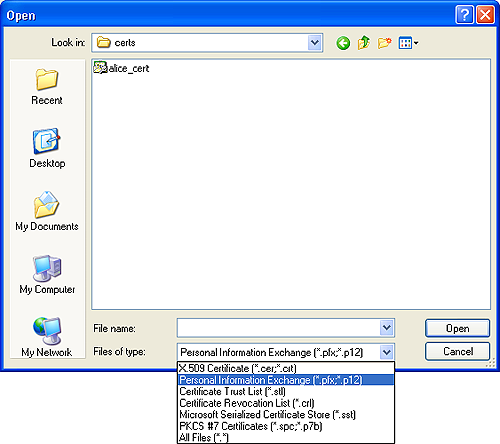
Now you need to change type of the file, select 'Personal Information Exchange (.p12)' from the drop down box, locate your certificate file (.p12) and click 'Open' (see below).
-
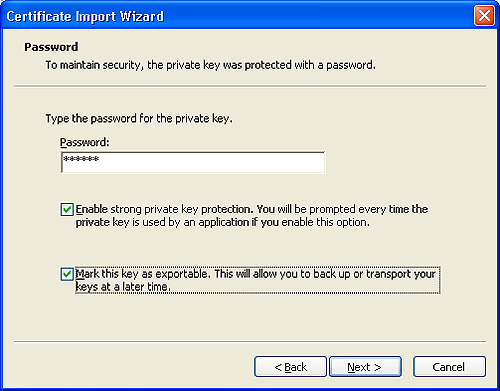
Click Next. To complete the installation process, you are required to enter the PIN (password) you set up for the certificate during the enrollment process. If you have forgotten your password, contact your system administrator who will be able to reset it for you.
-
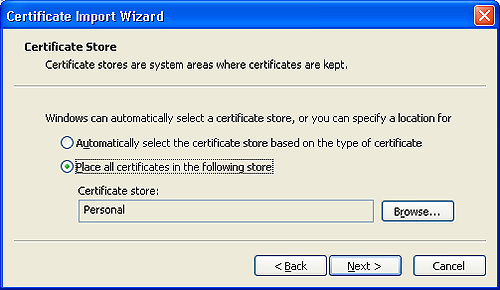
Click Next. You will be prompted to choose the certificate store for your certificate. Unless your administrator has specified otherwise, you should leave this at the default Place all certificates in the following store option.
-
Click 'Next'.
-
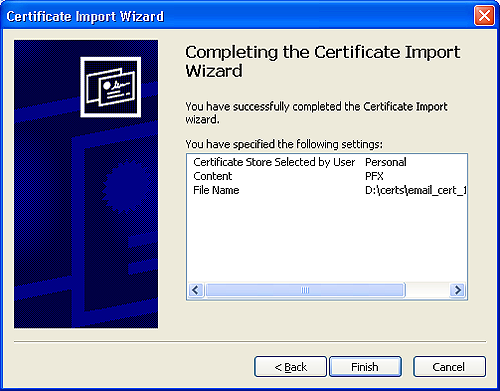
The last step: completing the Certificate Import Wizard.
-
Click Finish to complete the process. The certificate will be imported.
-
Select the security level for storing the Private Key in your system and click OK.

That's it. You have successfully imported your Comodo Personal Authentication certificate into your system.
Signing and Encrypting Mails
-
Signing an email ensures the recipient knows the email has come from you and informs them that it has not been modified in transit.
-
Encrypting an email ensures that only the recipient can read the email content and attachments.
Note: In order to encrypt mail, you must first have your recipient’s email certificate in your certificate store. To obtain their certificate, you need to get your contact to send you a signed email. Upon receipt of the signed mail, their certificate will be automatically imported into your certificate store and you will be able to sign/encrypt mail to that person.
Assign the certificate
-
Right click on your email account name in Windows mail or click 'Tools' > 'Accounts...', select your account and click the Properties button.
-
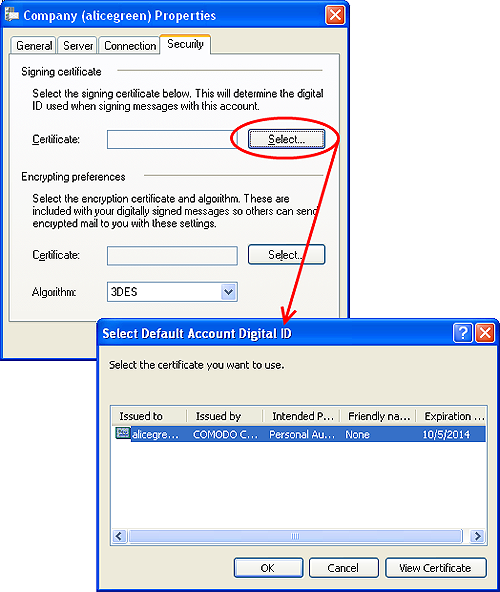
In the Properties screen, click the Security tab.
-
Click 'Select' beside the text box in the 'Signing certificate' area and select your Comodo Personal Authentication certificate in the 'Select Digital ID' screen. Click 'OK'.
-
Similarly, click 'Select' beside the text box in 'Encrypting preferences' area and select the same certificate for encryption by clicking OK in the 'Select Digital ID' screen.
-
Click OK in the Account Properties dialog to return to Windows Live Mail.
Signing and encrypting individual mails
To sign mail:
-
Compose your email and attach files as usual.
-
In the message window, click Tools from the menu bar. If the menu bar is not displayed, click on the 'Menus' icon
in the title bar and choose Show menu bar. -
Check the Digitally Sign option from the drop-down menu and send the mail.
To encrypt mail:
-
Compose your email and attach files as usual.
-
Click Tools from the menu bar. If the menu bar is not displayed, click the 'Menus' icon
in the title bar and choose Show menu bar. -
Check the Encrypt option from the drop-down menu and send the mail.
Signing and Encrypting all mails by default:
-
Open Windows Live Mail and click 'Tools' > 'Safety Options...'. If the menu bar is not displayed, click on the 'Menus' icon
in the tool bar and choose Show menu bar. -
In the Safety Options screen, click the Security tab.
-
Select the 'Encrypt contents and attachments for all out going messages' and/or Digitally sign all outgoing messages check-boxes as required.
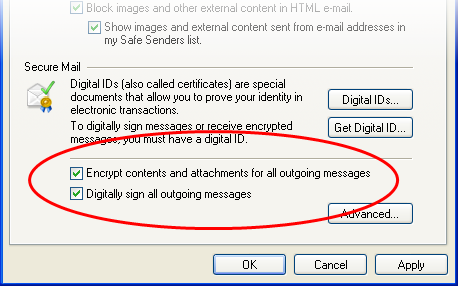
-
Click 'Apply' then 'OK'.