Assigning your Certificate to your email account:
These instructions assume you have previously followed the instructions to save your certificate to a secure location. Thunderbird has it's own certificate store and does not automatically pick up certificates from the Windows certificate store.
- Open Thunderbird
- Select Tools from menu
- Select Options from drop down menu
- In dialog box that appears select Advanced tab
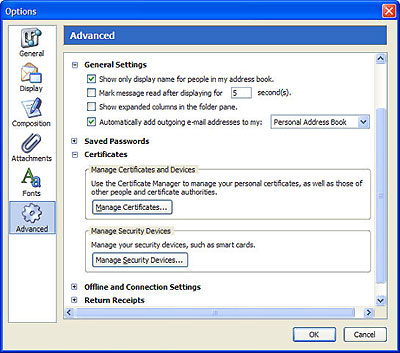
Click on the Manage Certificates...
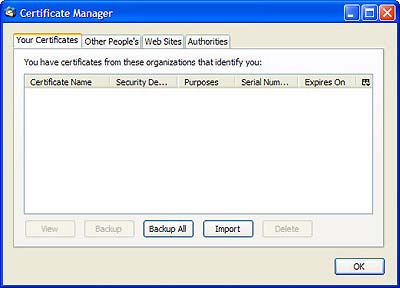
Browse to the location of your PKCS12 certificate and enter any necessary passwords. Once complete the certificate will appear and you will be able to digitally sign e-mails you send out.
Signing an single Email:
Signing an email ensures the recipient knows the email has come from you and informs him / her if it has been tampered with since being signed.
- Compose your email and attach files as usual
Encrypting a single Email:
Encrypting an email ensures that only the recipient may view the email content and any attachments. Note: in order to encrypt an email for the recipient you must have the recipient's digital certificate, and their digital certificate must be assigned to the relevant entry in your address book
- Compose your email and attach files as usual
- Ensure the recipient has a Digital Certificate and you have assigned the Certificate to their entry in your contacts area
- Follow the process above and choose Encrypt This Message
- Click Send button
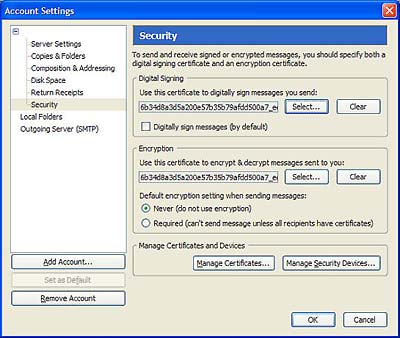
Signing and Encrypting as default.
- Open Thunderbird
- Select Tools from menu
- Select Account Settings from drop down menu
- In dialog box that appears select Security tab
- Select the appropriate certificates you wish to Sign and/or Encrypt your mails. Note that the same certificate does not have to be used for both options.